Operation manual of robot management platform
一、Login platform
https://serviceglobal.autoxing.com/admin/#/(Overseas platform address),It is recommended to use Google email registration, registration with the company email, may be blocked by the company firewall, can not receive the verification code. After registration, please provide your user name or email address for review.
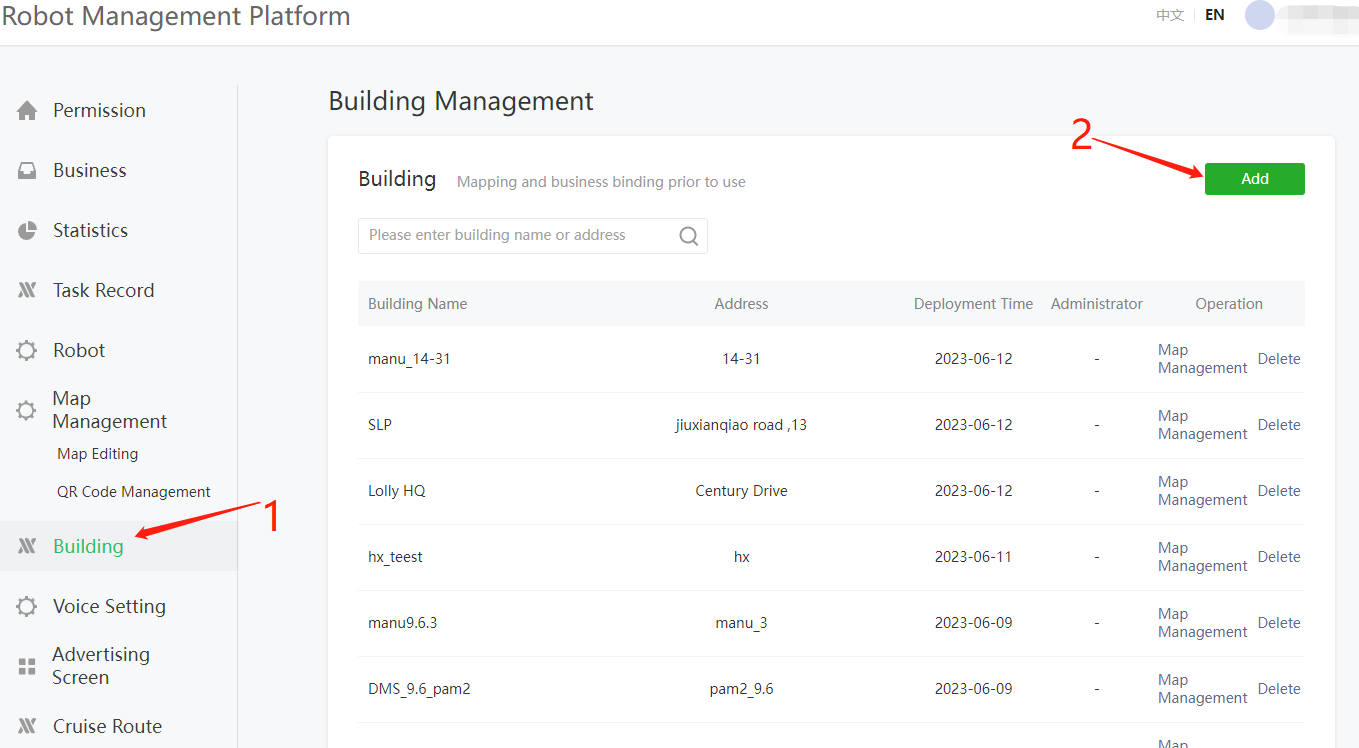
二、Building
① Create building.
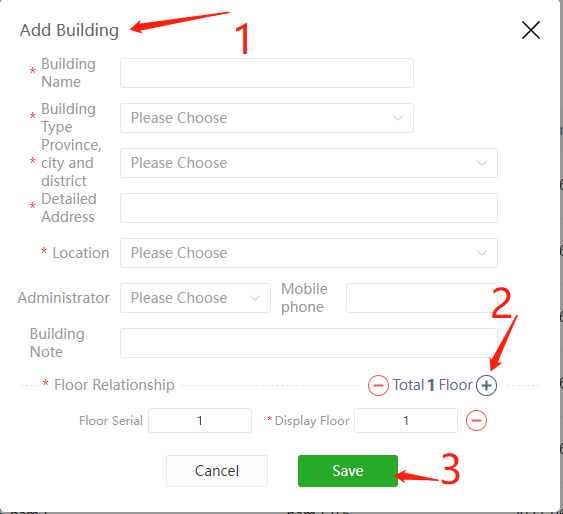
② Add building information.
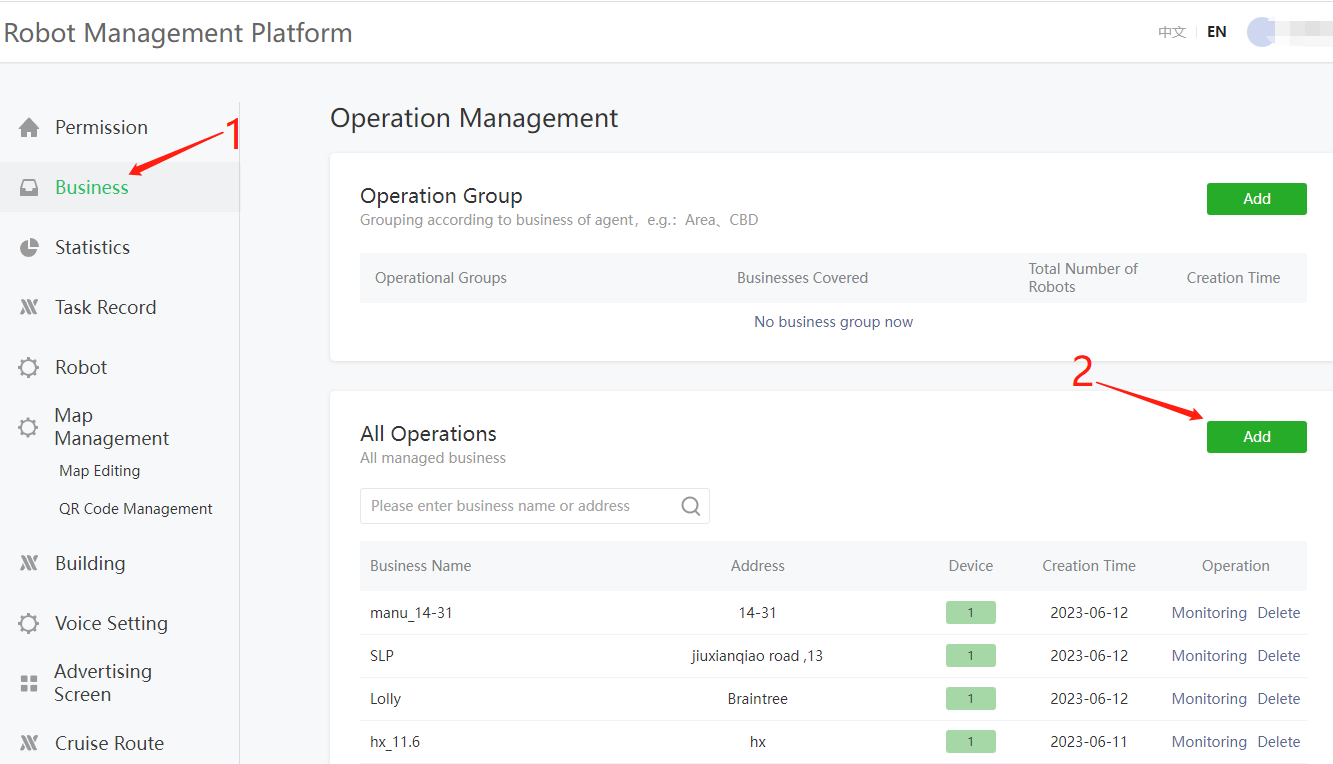
三、Business
① Create Business
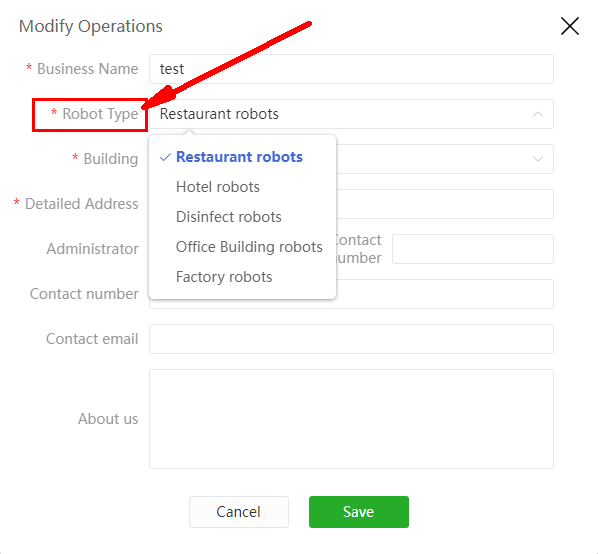
② Add information within the business
③Robot Type:
Note: Select the corresponding robot type. Mars, open multi-functional distribution, closed restaurant machine, choose restaurant robot or factory robot.
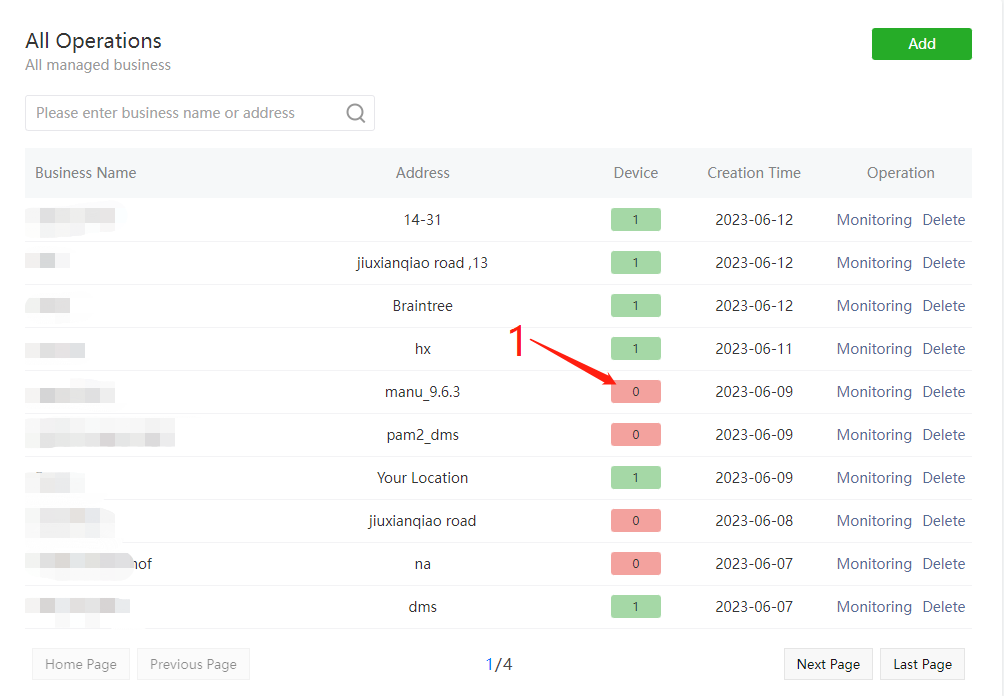
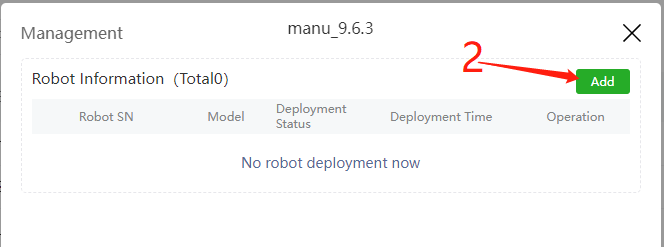
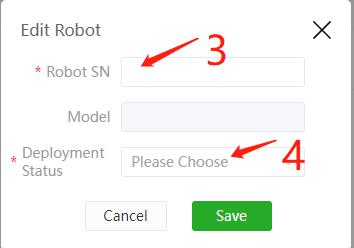
④Add robot SN under business
If the robot is already in the previous business, it is necessary to copy the robot SN, then remove the machine, and then add the robot SN to the new business.
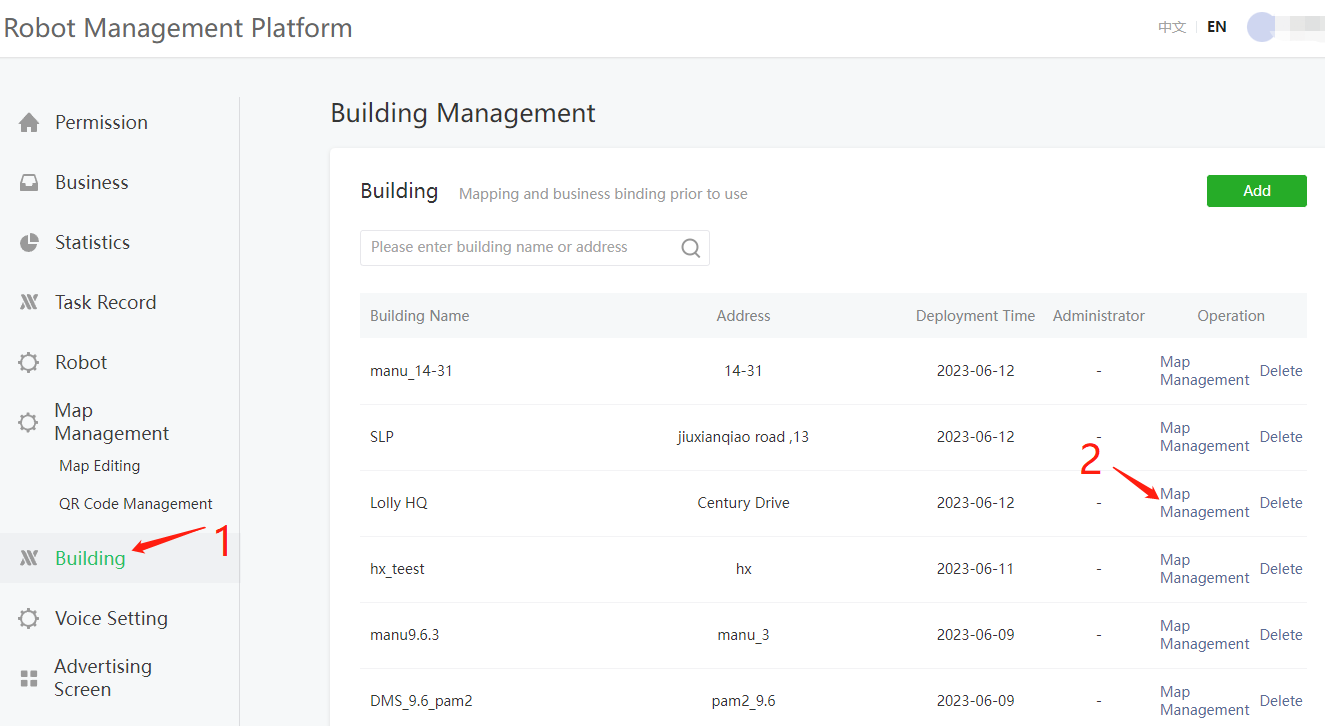
四、Create a map
1、Building management, "Map Management" to create maps
2、Prepare to create the map
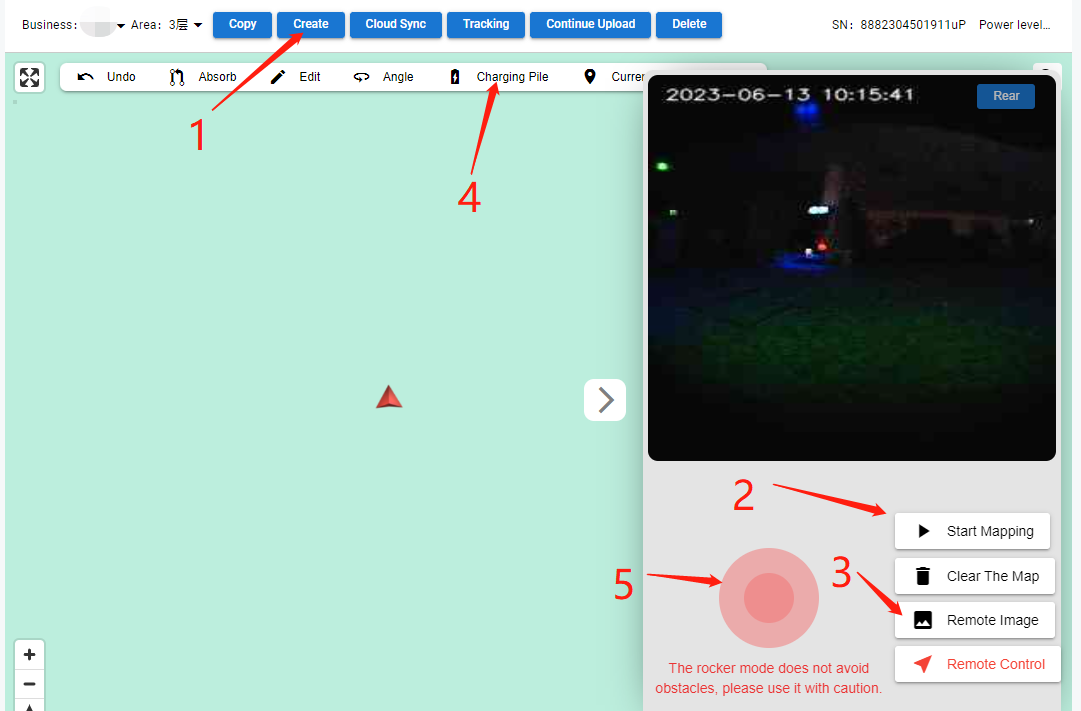
①The robot starts to create a map on the charging pile, click "Create" to fill in the information inside.
② Click "Start Drawing" in the "Expansion box" on the right.
③ Open Remote Image.
④ Set up the "charging pile" station.
⑤Use the right "joystick" to control the robot to leave the charging pile, and then control the robot to rotate 360 degrees in place, the purpose is to scan the surrounding environment. Special attention: The use of "joysticks" to control robot movement, no obstacle avoidance function, and there is a high risk of network delay.
⑥ On the map displayed on the left, click the left mouse button in the "orange" area of the map in front of the red icon, and the robot will automatically follow and start creating the map. Risk areas such as steps and glass should be avoided. You can also push the "red" button on the robot to create a map on the back of the robot.
⑦After the end of the drawing, it must be "cloud synchronization". Otherwise the map cannot be saved. Every time you modify the map, you need to perform "cloud synchronization".
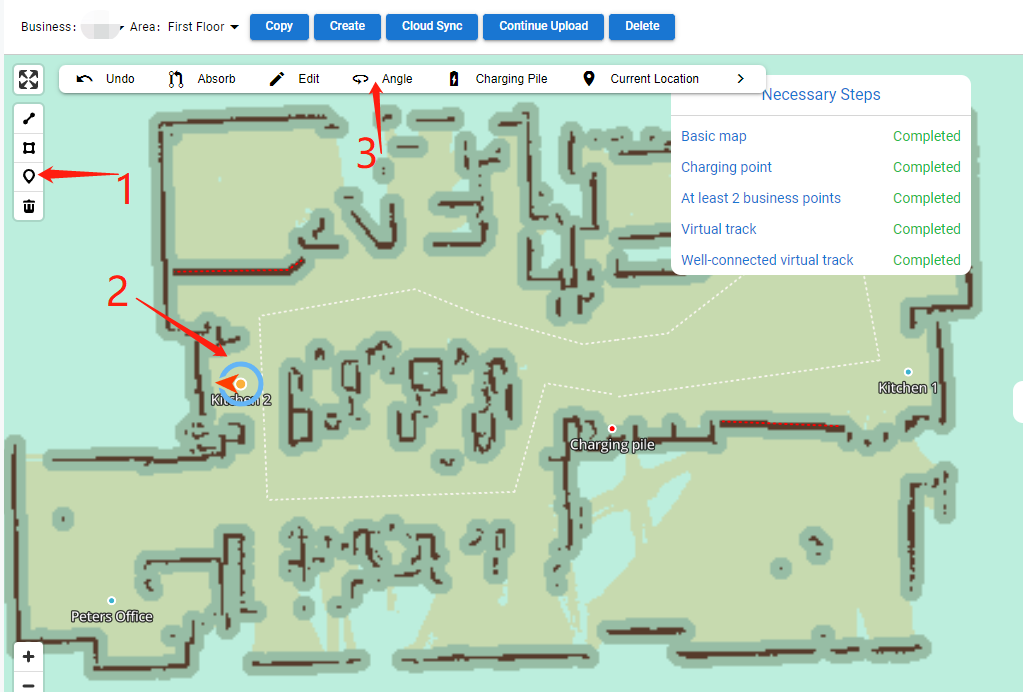
3、Set "points" in the map
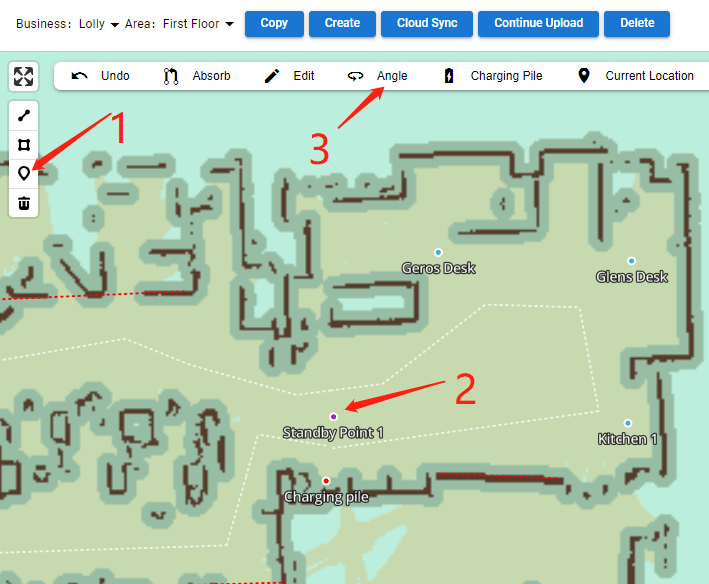
① Left mouse button select the left "Point", the mouse becomes "+" can be set in the map.
② In the "orange" area of the map, set the location of the point. In the figure, the black lines represent obstacles. Do not hit the point on an obstacle.
③ The left mouse button to select the map "point", will be thicker. Then select Angle. The left mouse button can adjust the "point" Angle. When the robot reaches the point position, the "red arrow" is the front of the robot.
④Charging point Angle, pointing at the robot. Otherwise the robot won't work.
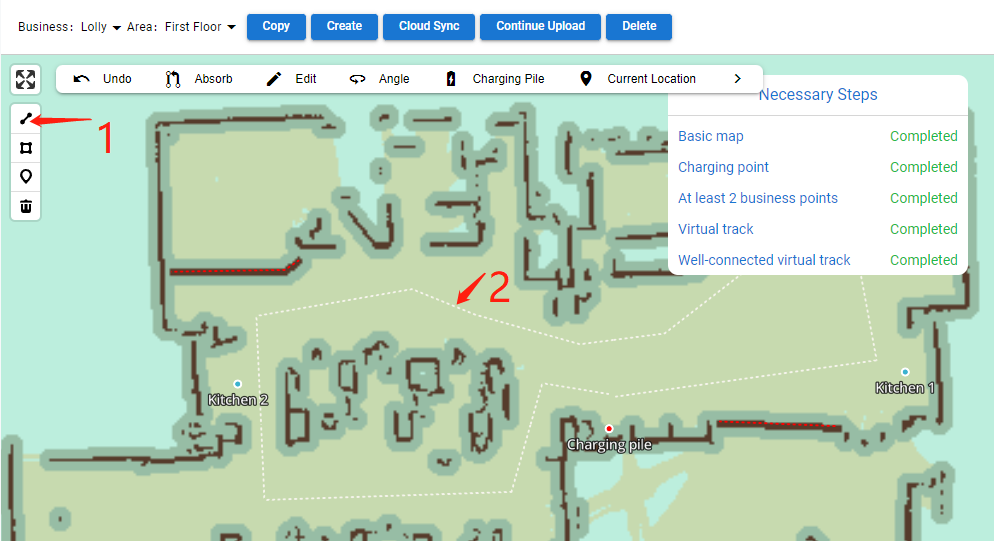
4、Set up "virtual track". The virtual track is used for route calculation and path planning, and the robot does not strictly follow the track line.
① Select Line.
② In the "orange" area of the map, use the left mouse button to draw a line through all the points. Double left click will end. "Orange" zone, where the robot can move.
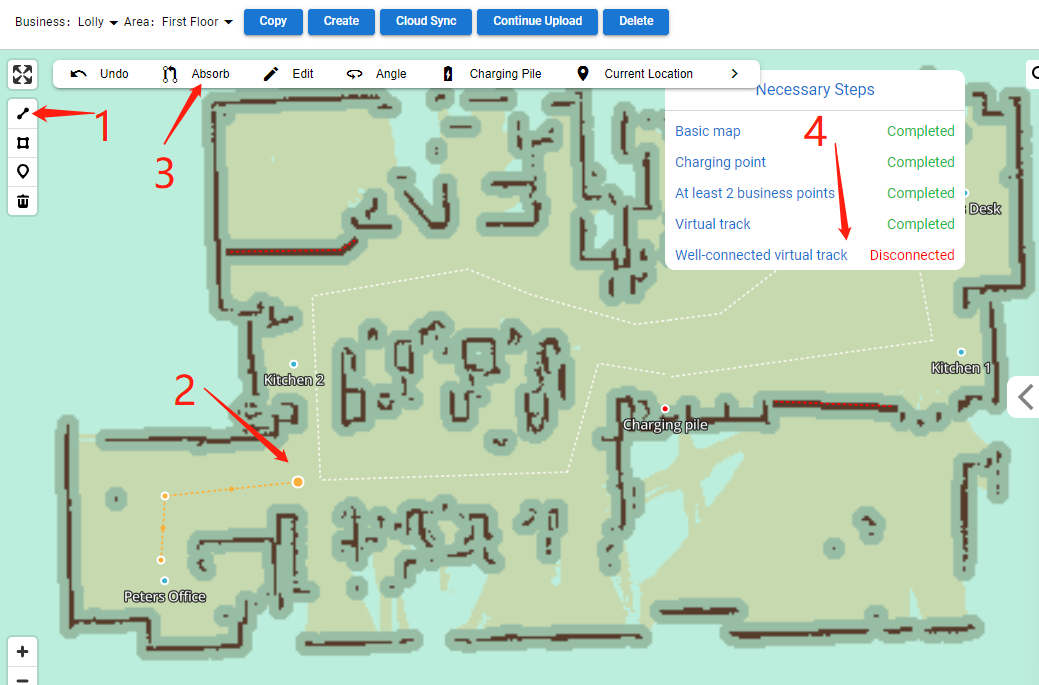
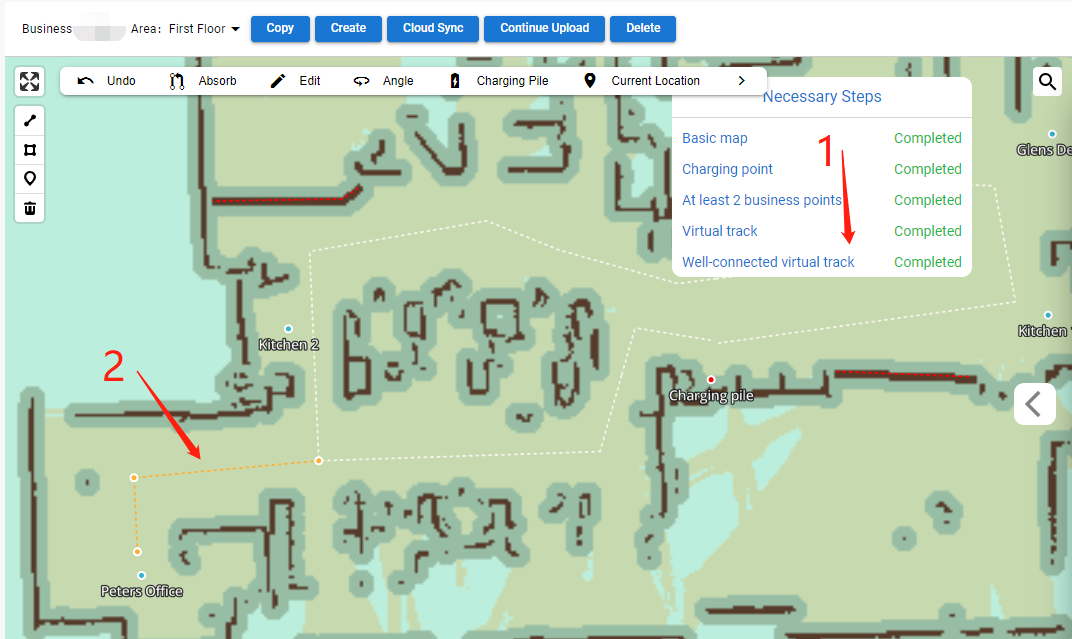
5、Absorption
The "white dotted line" in the map is a virtual track line, and it is not recommended to draw lines in the same area when crossing. If there are multiple "virtual track lines" at the intersection point, select one first with the left mouse button, then select the end point at the intersection of this line, and click "Adsorption". The goal is to turn multiple lines into one line. Check method: left mouse button select A white "virtual track", press the keyboard lowercase letter A, both lines become orange, check the other lines one by one.
6、Special note: The map is almost complete.
① There is a map
②There are charging points on the map
③There must be at least two stations on the map.
④ There are "virtual track lines" on the map, which are connected.
7. Below is "Bonus Points."
①In the map, dangerous areas and areas where robots cannot go are surrounded by red "virtual walls". Select "LINE" on the left side of the mouse to close the forbidden area, so that the robot can move better.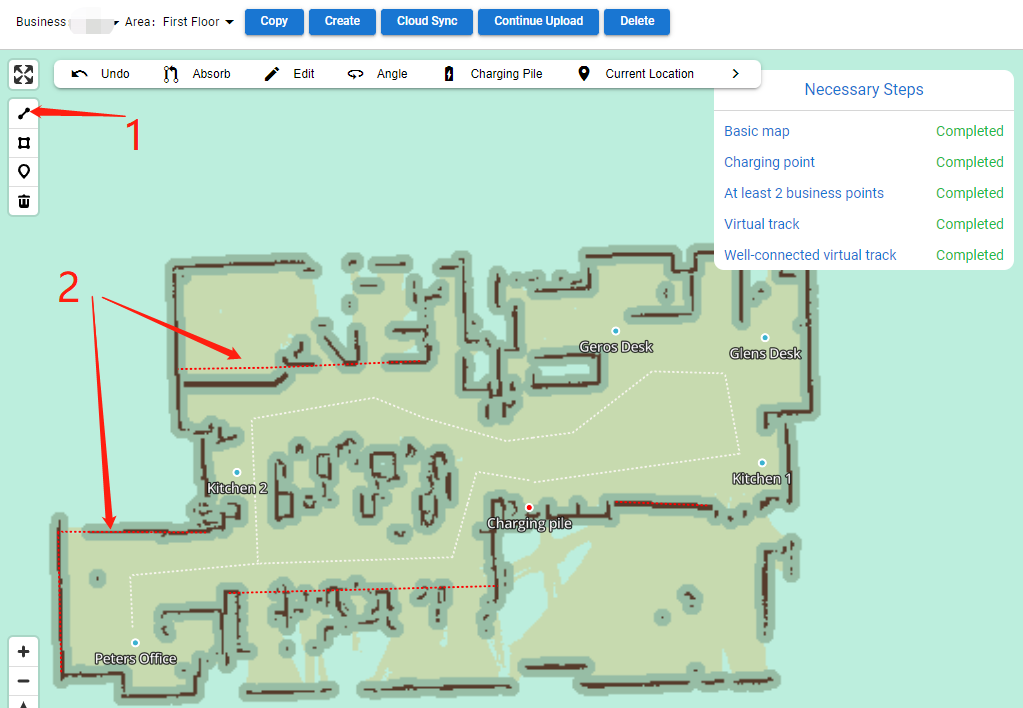
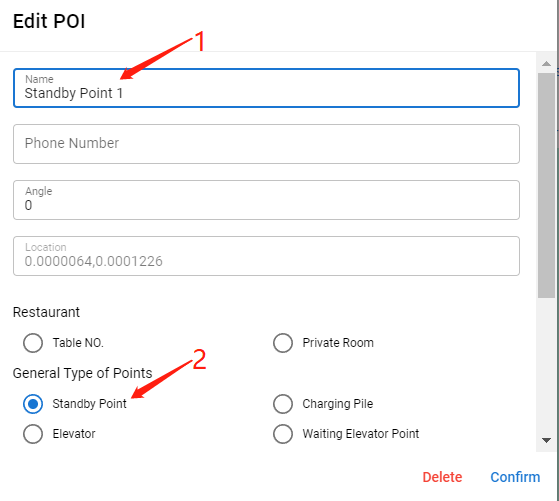
②standby point
Set up “standby point”, such as the food outlet of a restaurant or the front desk of a hotel. When the robot is idle, it can be on standby here.You can set the "angle" to facilitate sending tasks.
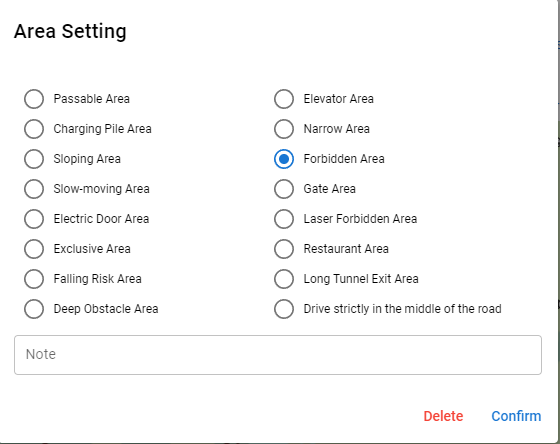
③Polygon
In the map, use the "polygon" tool, and the area is closed, double click the left mouse button to end the closure. You can set the corresponding Area Properties. For example, passable areas, removal of obstacles; In the elevator area, the outline of the area in the elevator can be circled to realize the function of the robot riding the elevator. Prohibited areas, no passage; Slow moving area, slope area, the robot will slow down after passing through this area. And so on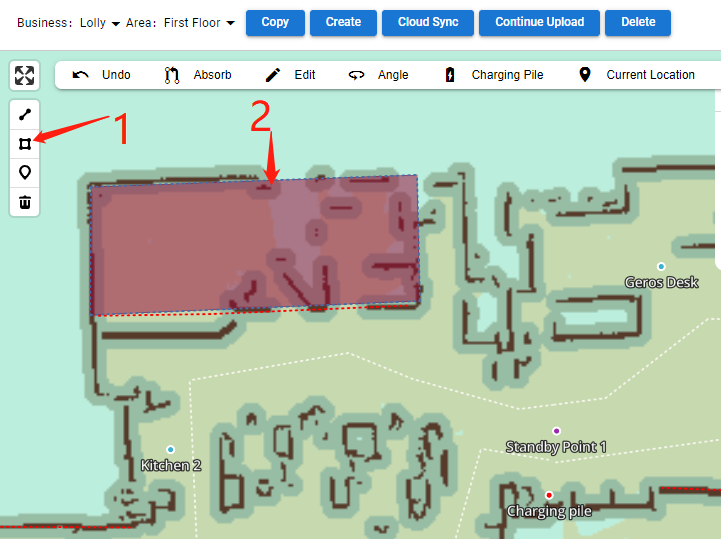
8、Cloud synchronization
After the map is modified, you must click "Cloud Sync" to prevent the loss of internal map information. Whenever you modify the map, you need to "cloud sync".
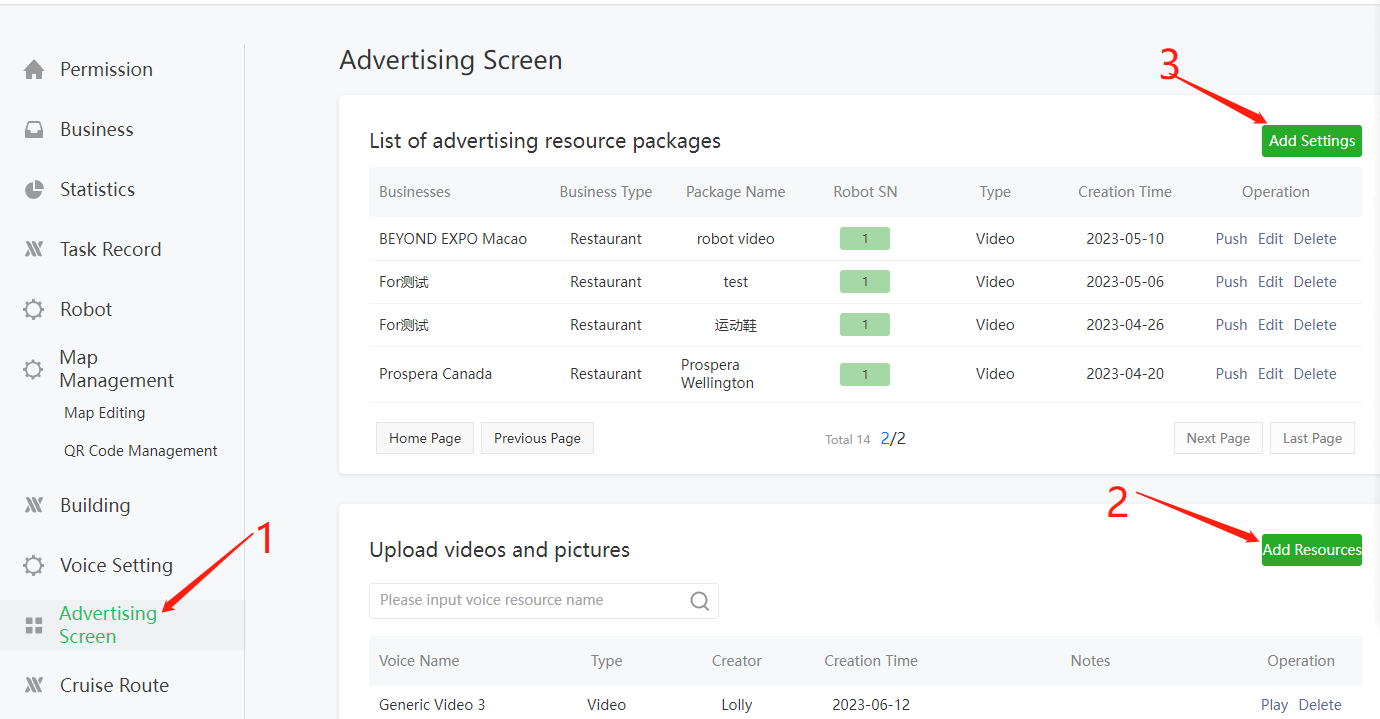
五、Large screen on Mars robot, add pictures and video operation
① Enter the robot management platform
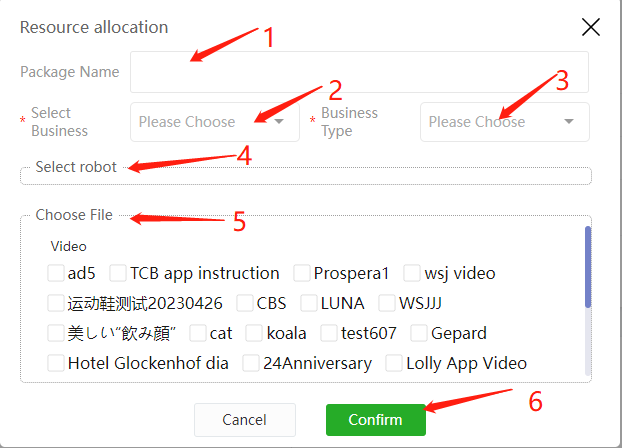
② Resource management. Add resources first, and then add Settings. Required image JPG format, video MP4 format. 1 video, Max. 100mb. The maximum support is 1080*1920.